Blog

Acratech GXP Ballhead

Arcratech GXP Ball Head

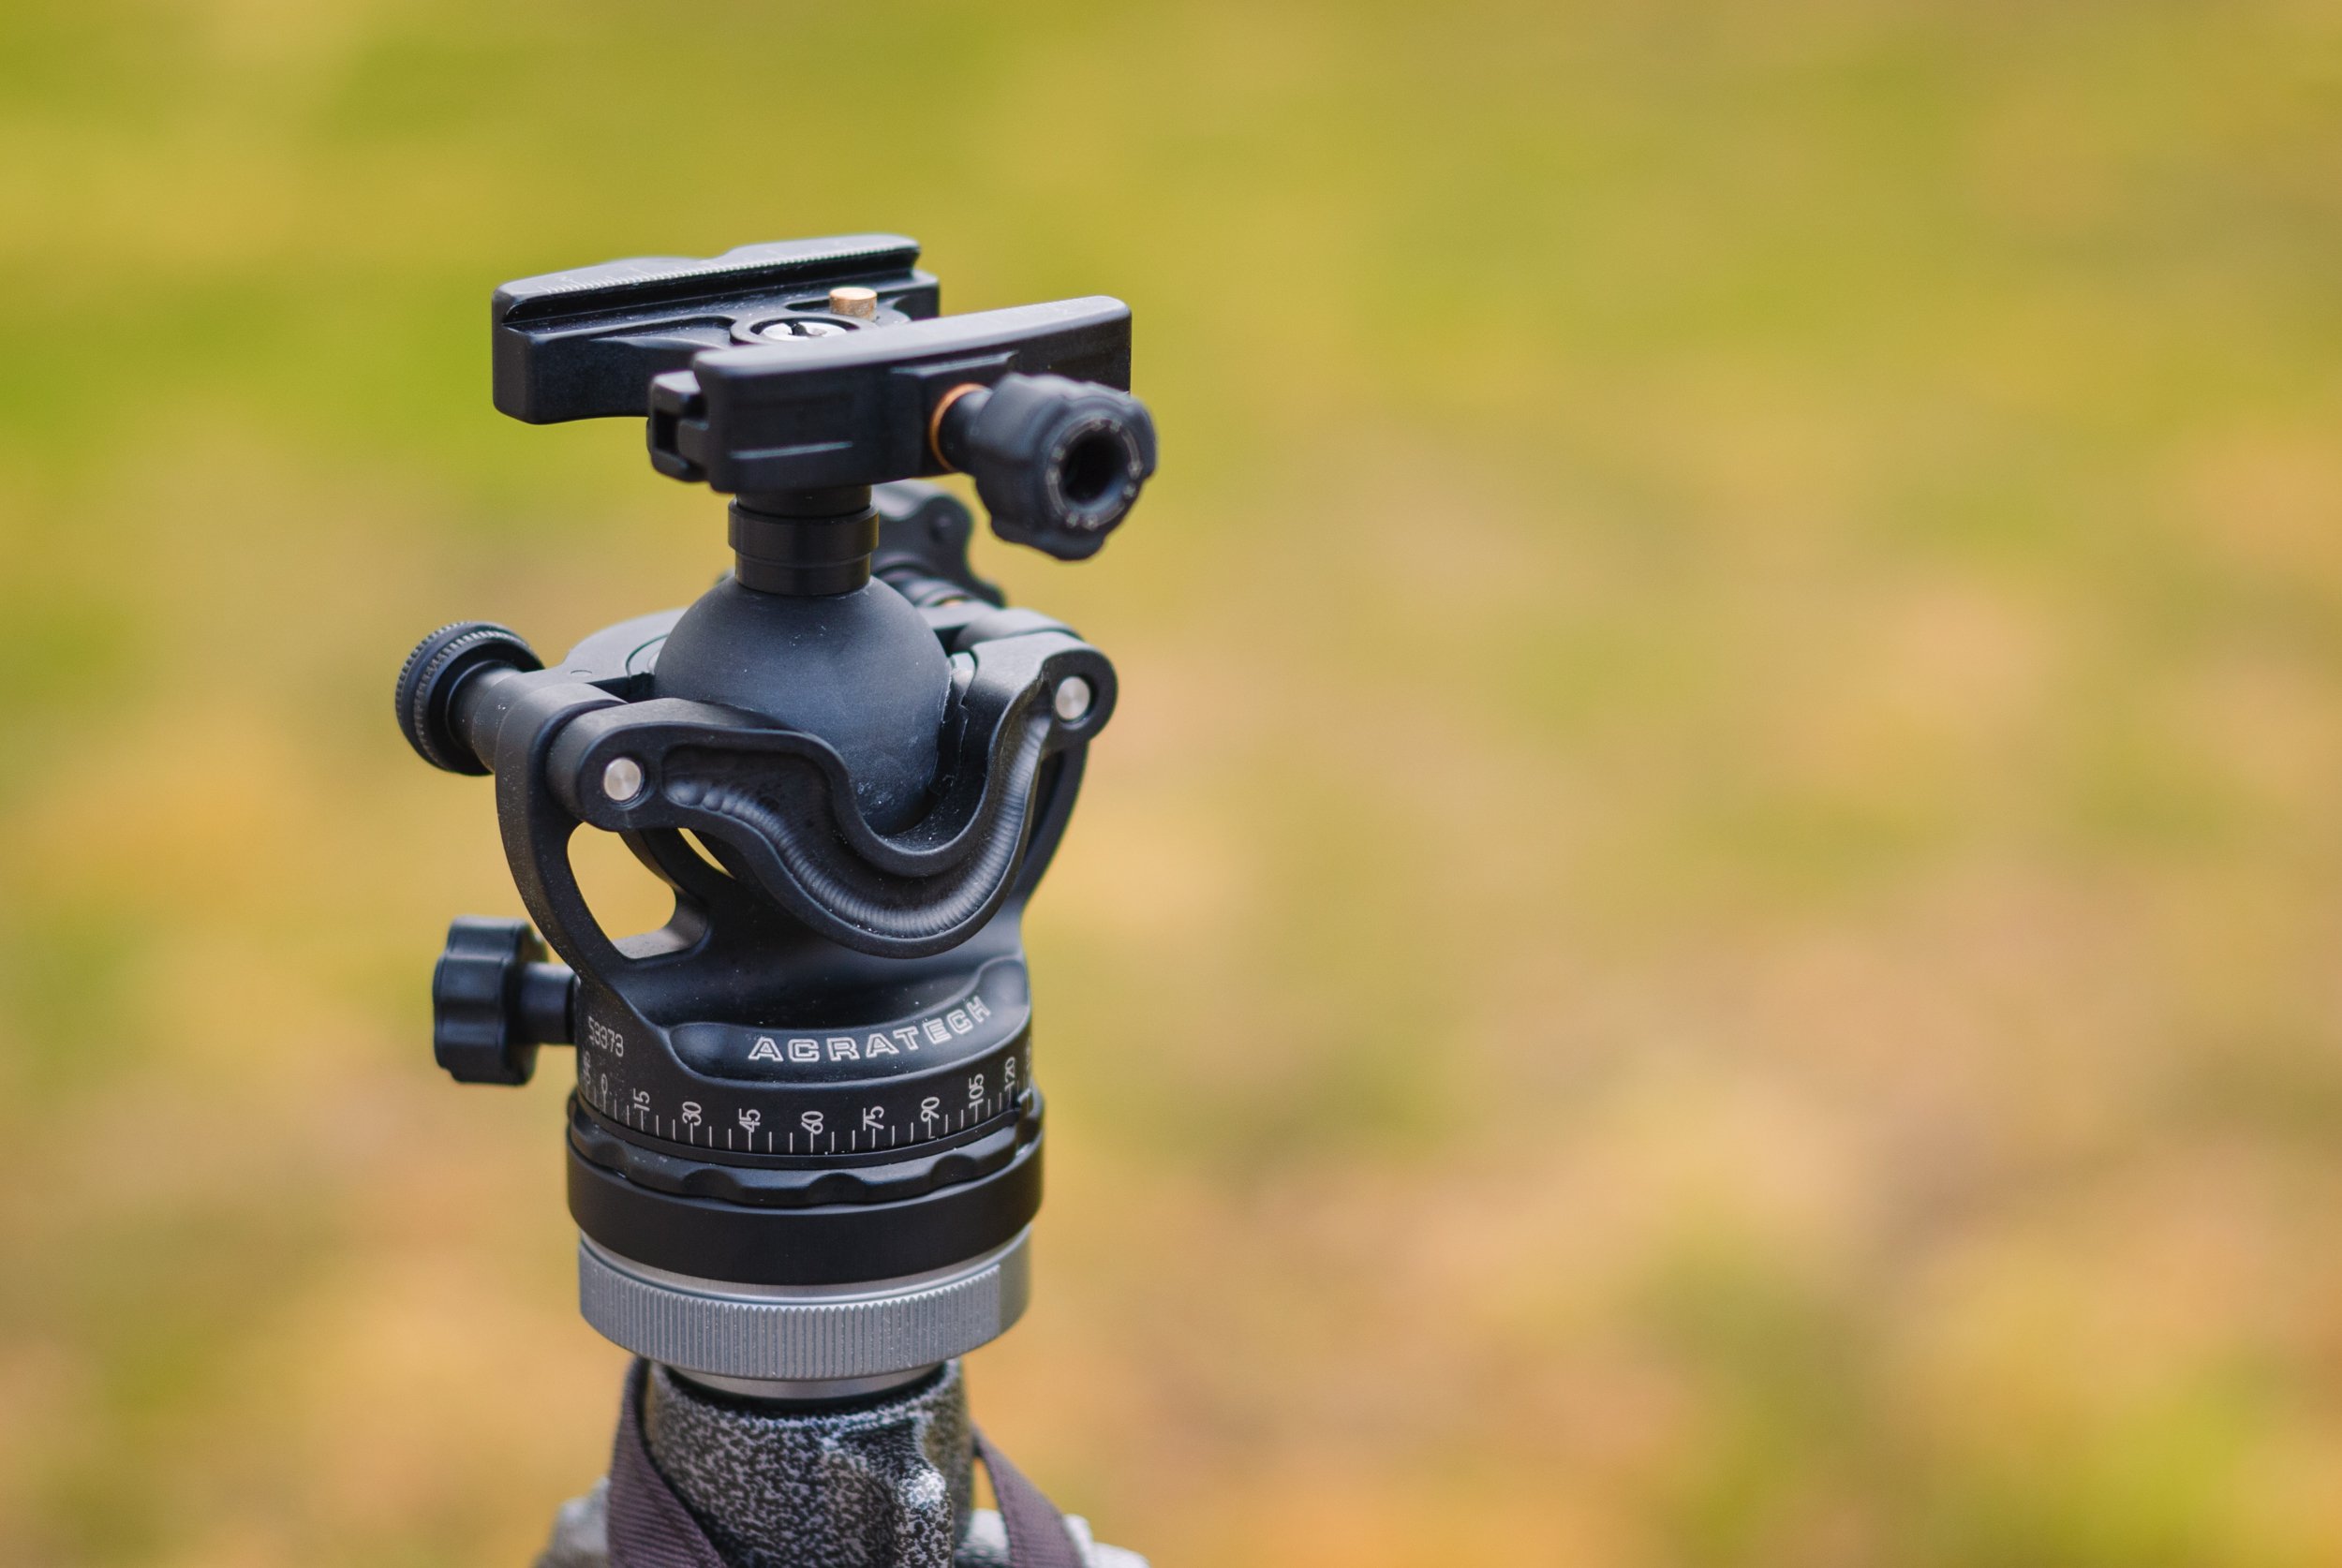
Acratech GXP Ballhead with Arca Swiss style plate

I have been shooting with this very special ballhead now for around nine months. I had heard of Acratech years ago, and noted they were a highly sought after brand based in California. In recent times, I updated (or added to) my current tripod by purchasing a Gitzo Mountaineer Series 3 - finally being properly serious in the tripod department. Not a cheap investment, and more on that later. I was searching for a new, excellent ballhead to pair it up with. I searched around and explored / mulled options for a good few weeks - which is mostly how I make all my decisions photographic. What always impresses me is solid engineering concepts. This thing looked very different, and with the Acratech name branded on it - caught my eye immediately. I watched this video on youtube which I have got to admit, totally reeled me in, called Acratech Ball Head Performance. Watch as Scott, drops a two-tonne truck onto this ballhead, and it does nothing to it. He freezes it, drops it in sand. It comes out unscathed, undamaged, fully functional. I am sorry if this doesn’t do it for you but to me and my background - I simply love when someone designs something and puts their heart into it and better still, gives you a 10 year guarantee with it. I love people that stand by their designs and products - this sort of behaviour speaks to me. (More on this later)

Acratech GXP Ball Head Close up Level

The Build

This Ballhead is constructed of aircraft quality 6061-T6 Aluminium and is C.N.C (computer numerically controlled) manufactured, which basically means - to very high tolerances. All threaded fasteners are machined from stainless steels and all bearing surfaces are machined from a special copolymer similar to Teflon. The ballhead has a very solid and substantial feel, weighing in at 450 grams, yet able to support a weight of just under 23kg. There is a very handy and accurate spirit level too that comes with both versions of this GXP head. All the knobs and dials have a quality feel and are locktited to and designed not to be able to come undone or fall off. Unlike other ballheads, this is an open design, which means sand, grit etc does not affect it in the same way that it could with other ballhead designs. This is definitely a plus. There is even a lovely 360 degree dial on the base with a moveable marker - perfect for panoramic / star tracker usage. I have used this as my main ballhead for landscape and astrophotography for some time now and I have never had more trust in a product. I love the solid feel, the overall construction, the solidness of the clamp and the fine adjustment of the dials. I use the marked base for astro work to give me nice overlaps too - it all just works and nothing gets in the way of it’s function, cold, heat, or even dropping a two-tonne truck on it! (I try to avoid this, though).


Panoramic Function and Star Tracker Use

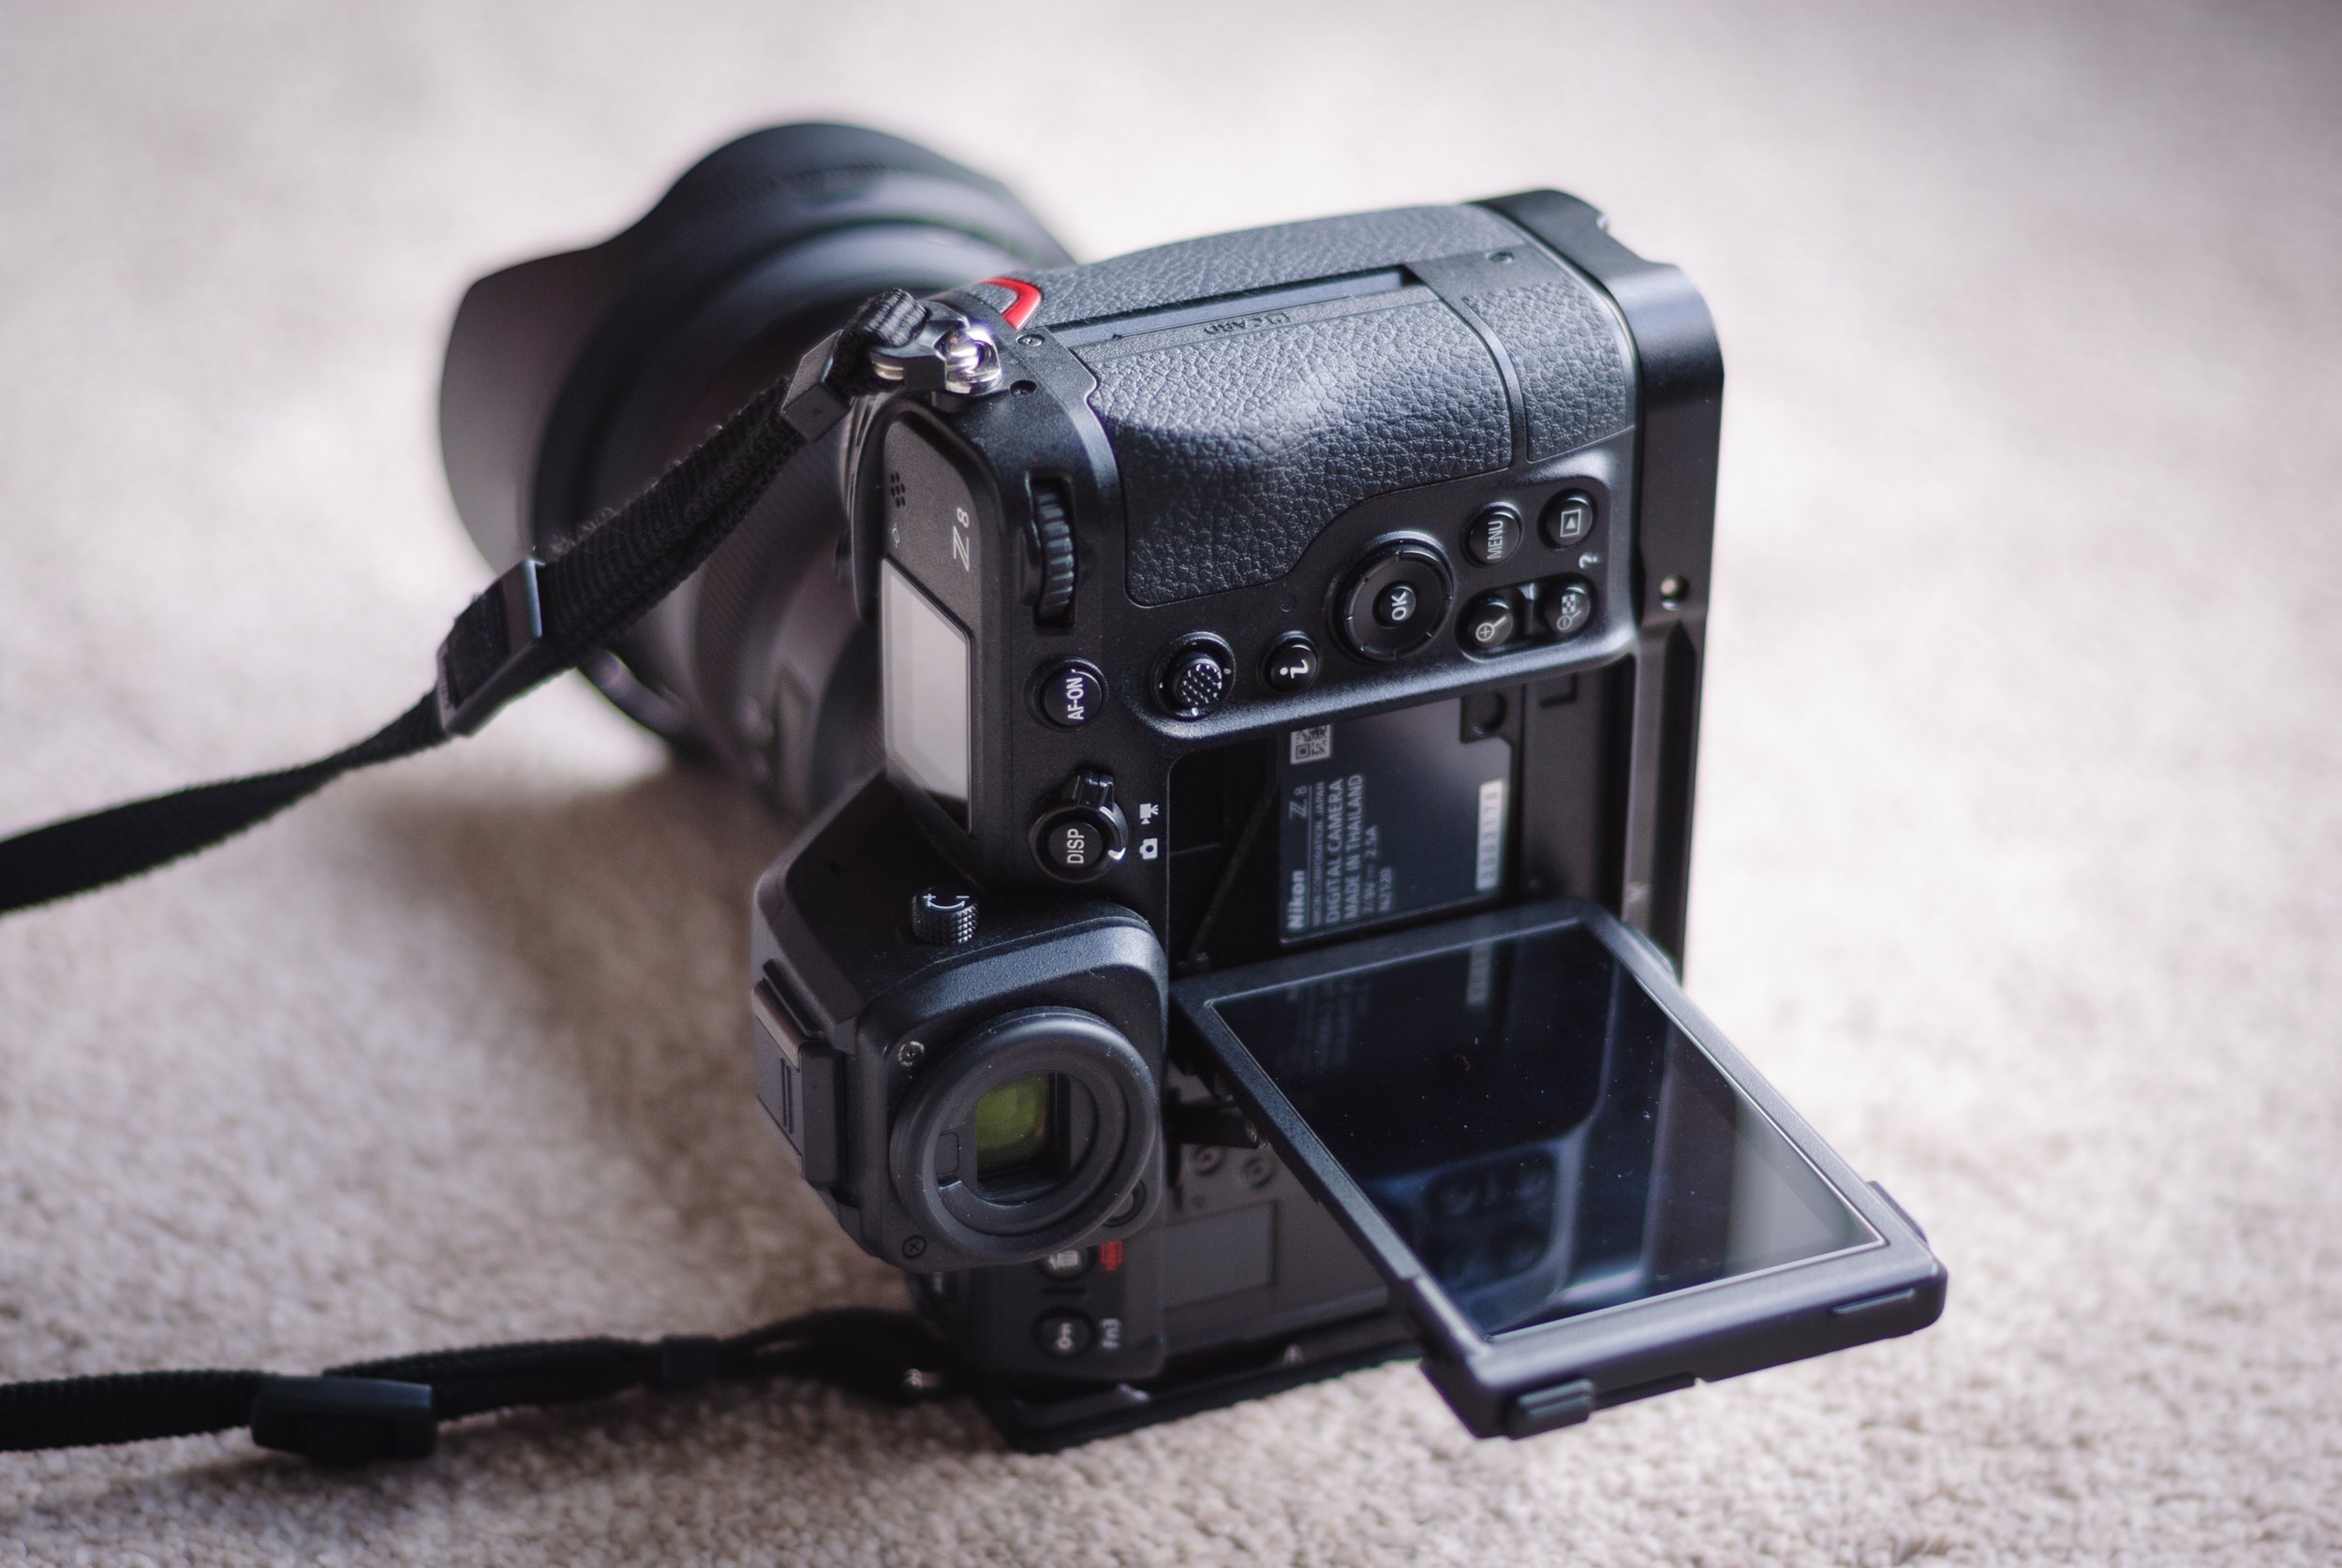
The GXP also has a very nice panoramic function. Using the provided allen key, in the field, the whole thing can be turned up side down by removing the quick release clamp and installing it on the base (it is a very fast thing to do and sounds more difficult to do than it actually is - it’s easy), allowing for panoramic images to be taken without the requirement for a levelling base! It really is win win if you hate getting the whole tripod level for functions such as this, and will aid your pano stitching software and improve your end result with things like distortion and stitching. For star tracker use, which I do a great deal of it works really well. With a camera like the Nikon Z 8, I have done away with bothering to use a shaky V platform to level the ballhead, and now I just use the GPX directly connected into the star tracker declination plate. I am able to do this up to about 85mm no problem and still stitch the panorama no problem. (85mm is where I stop with panos - I find any more than this and it is torturous, I prefer 50mm maximum most of the time). The reason I am able to do all this is the Z 8 camera is so sensitive at night, I can swing the camera to the right positions using the LCD monitor and the GXP keeps everything ultra stable as the shot is taken.


Which one is right for you?

There are two varients of this ballhead, a standard clamp which is what most of us are used to when using arca - swiss style clamp systems. One simply places the plate into the clamp and tightens it down with the knob. The other option is a locking lever. Faster of course, however I prefer to stick with the standard so that there are not differences between my other ball heads. This could lead to problems at night, at worst, equipment falling from a height and being damaged. It is for this reason that I try to keep consistency with these types of things. I like to have the spirit level my side of the camera, so this means with the standard clamp, the knob is at the side you don’t see when clamping. I got used to this very quickly and have had no problems ensuring a snug and secure connection to my camera.


Where to Buy?

In the UK these babies can be difficult to come across. I highly recommend looking at Bob Rigby Photographic, who are official UK importers of Acratech products. Their service and advice is second to none and they always go above and beyond with aftercare. They have both style’s of GXP and other Acratech products on their website which come usually in only a few days maximum. Regarding Acratech themselves, I’ve actually been in conversation with the founder and CEO, Scott Dordick when I accidentally scraped one of the adjustment knobs off a rock during a minor fall. Via the team at Bob, he simply sent a knew knob with instruction on how to fit it. He reassured me that if any servicing or the like was ever needed to post it back to him and he would look at it. Now that is peace of mind that is missing in a lot of products these days, and the old adage: you get what you pay for. Whilst not a cheap product at all, this absolutely applies here, and a user can waste so much money buying multiple inferior products. Coming in at around about the same price points as RRS ballheads of this level (B-40, B-55), I feel I snagged all the advantages and none of the disadvantages of a what I feel is the best ballhead on the market today for landscape / astro use with the caveats mentioned in this short review. Highly Recommended!

Steve

Acratech Ball Head

Nikon Z 8 Camera


A Mini Review from Summer 2023


This is a long one, with some rambling, so get yourself a drink and get comfortable!

Nikon Z 8 Camera Review

So I have mainly been a DSLR shooter for well over a decade. I have multiple bodies - from a D200, D700, D810 and a D850. The Z 8 was my first buy in to mirrorless, as I felt it was a d850 in a mirrorless form. I think this is a fairly accurate view despite it also being a baby Z 9 if you take for granted that the Z 8 obviously outstrips the 850 in focus, FPS and video modes. I will be using this camera to do astrophotography - both astro landscape, and deep sky. Along with plenty of regular landscape photography and portraiture. So I don't require great speed or fps but the other aspects of this body finally drew me in to Nikon’s Z mount.

Nikon Z 8 Top plate view

First off...the Z 8 is beautiful: It looks stylish. It is sleek, curved but carries the hard edges synonymous with the Z mount styling. The top screen and clover layout of buttons on the top left of the body have made a return in mirrorless world and this is a great thing indeed. I like the LCD monitor which flips both ways and is highly detailed. It takes time to feel confident opening and closing it initially though. The playback and menu buttons have moved to a more logical placement on the bottom right ala the Z 9. Button placement is nicely done and there are plenty to limit menu diving like Nikon’s previous mirrorless bodies. (It is however, annoying however that Nikon took the VR switches off it's lenses; forcing a menu dive). Customisation of the Z 8 is excellent; you can be confident that you will be able to set up everything how you like it to be. The focus mode button is back. The grip is comfortable and really reminds me of the 850. The light up buttons: a boon for Nikon but a crying shame for Canon or Sony shooters that don’t have this! The EVF / LCD switch easily, automatically when appropriate, and this has been well implemented overall. The EVF is bright and smooth (it drops into choppy mode to save energy at times, the time at which it does this can be user adjusted or shut off completely and kept ultra smooth. I find the EVF resolution good, especially when reviewing photos I can see and zoom to check focus has been attained with no problems. The LCD monitor is great, ala the D850 and it tilts in both axes finally, something I believe should have been done along time ago in DSLR land. Battery life is not very different to me compared to a D850 because of the way I used the D850. It was mostly used with the LCD monitor on - thus there is no change in this aspect for me. If you only used OVF, you should buy an extra battery or two. I did wonder if I'd get the same life as say shooting the D850 with LV only vs the Z 8 in 'LV' mode and I do. This was important as I spent a lot of time with the d850 in silent mode, using the LCD exclusively. This limits shutter wear on deep sky astro and landscape time-lapse and prevents vibrations. Another logical reason to get the Z 8 for me, I thought. I love the extended shutter speeds up to 15 minutes. I don’t really use the 10-pin socket much at all now, (however I do need that for connecting into my star tracker so I am glad it still exists) and I used to extensively because I am a long exposure photographer for a lot of what I do - either during the day or at night. This has improved my user experience as dealing with remotes generally speaking can be a faff. This is however, a function should have been in DSLRs years ago. (I note the Z7ii had this). Further to this...I have always said to myself that a Z 8 will not, for the most part change my photography and that's fine, you wouldn’t want that to be the case anyway. For me it is going to he about user experience and new possibilities. This leads me to starlight view. This is a huge boon for someone like me who spends nights under dark skies. No longer do I have to stand about wasting time with high ISO test shots on rare clear nights that we get here in Scotland. I can compose with starlight view fast and easily, then take the shot. This is quite liberating! It also helps in deep sky photography to frame up the target (more on this in the coming months perhaps). I can feel more connected to the scene now and have now with me, night vision, it is so sensitive it will pick up faint aurora in this mode, that my eyes cannot see. This along with the screen means I stay warmer and get shooting faster. I'll no longer need to lie on the ground to get those vertical shots. I'll also be able to easily power the camera all night with a battery pack and a simple USB-C connector. Autofocus from what I have seen so far is excellent. The new processor really bests previous Nikon mirrorless models and although I still find myself moving points about, I like the large boxes and letting it find eyes within them etc. Even with my 24/1.4G nikkor through the FTZ II, it nailed most shots of my son fast moving towards me. Simple stuff affects user experience!

Nikon Z 8 Flip screen

I would like to see some minor things. It might just be me but I would like the option to see a battery percentage like my phone rather than these little 90s looking blocks of a battery to simulate remaining battery lifespan. I'll live though. One thing that I did notice...the on off switch is very 'sharp' feeling compared to the DSLRs. I understand the ‘Z’ styling but let's not cut our fingers Nikon, again I can live with it. (2024 edit - I strangely got very used to this now and don’t notice it). Okay elephant in room for anyone that is serious about data collection. RAW histograms. Granted this isn't just Nikon; all the camera companies need to take this seriously; especially at this price point. This would really allow pushing the data as far to the right as possible (the shot on the monitor would look terrible but that would be corrected later - you would achieve technically perfect exposure for the sensor that could be developed and worked on in post processing). I can get close to this without RAW histograms, but just that little bit more would be nice since we are shooting with a ‘big boy’ camera. I'd like to see Nikon provide a mode for deep sky astro guys like me to turn off the peripheral shading correction applied to RAW files or any data filtering on the files applied to assist with daylight photography, which can sometimes cause concentric rings to form when stacking hours of data of a night. (More on this as I test). Couple other minor things spring to mind that Nikon should be doing. Nikon ought to allow adjustment of the f/5.6 aperture when focusing at f/5.6 or smaller apertures by way of a menu function, for example in studio with strobes or speedlights the system can struggle because it is trying to improve focus shift by focusing stopped down. This has an obvious detrimental affect on focus precision and it should be that Nikon allow an on/off of this function for studio guys, eg a setting that allows ‘force focus at maximum aperture always’. Allow me to resize and move the histogram on the EVF and LCD monitor. I repeat this again...RAW histograms too! Oh and one more. LCD automatic brightness. Nearly all phones do this. They go up to max in bright sunlight and dim back when we go inside. This shouldn't be a thing at this price point to have to manually adjust it every time. The Nikon D800 had this and then it has never returned in a Nikon body since. People need to learn to expose properly and easily get confused with LCD brightness, however I believe it should be a function for those that know. Nikon should allow the inbuilt profiles to be disabled whether or not they are enabled / disabled in the camera menu. I am hearing and experienced with some lenses they stop you enabling a vignette correction for example unless you had it enabled in camera initially (the metadata in the RAW file passes to Lightroom - if it ain’t in there, it ain’t coming up in LR to be able to correct it, save for f mount lenses through the FTZ II adapter). This makes little sense and is not helpful. Crop modes. Why the heck so we not have 4:5 I will never know? Someone at Nikon has physically went in and took this out from previous models! It is quite stupid of them and they should put it back in and avoid more nonsensical stuff like this going forwards…(2024 update - still no 4:5 crop mode in camera, you know, the one that has been in the D800, D810, D850 but now is missing in action. Nikon, come on!).

Nikon Z 8 Camera body

Apart from these minor gripes I cannot fault the Z 8. It is literally what I hoped it would be. Paired with my initial lens of choice, the 24-70/2.8S - can produce absolutely stellar results, in fact some focal lengths on that lens approach / beat prime like sharpness, details and rendition. I am very much looking forward to doing long exposure photography with this lens. (2024 edit - oh it is good!). This was another reason I wanted a Z 8 and to go mirrorless with Nikon. This lens is that good; it is probably the best in class 24-70/2.8S ever made for any 35mm format.

Lastly video. Very impressed. Especially with the 24-70/2.8s which is pretty much silent and just holds focus to the subject. I am enjoying not having to focus pull manually! I am not a huge video shooter, however I have been doing more of this. They need to look at waveforms and a couple of other functions for the really serious video guys but I have to say I am seriously impressed as Nikon’s video implementations have classically been lacklustre and this has all changed now.

So what's next? I am waiting to see what Sigma do with regards to primes. I would honestly bite their hand off to get a native 14/1.4 (I love their 14/1.8 for f mount and still own it). I would like updated 24/1.4 and 35/1.4 and 50/1.4 primes from sigma for Z mount. Nikon’s 1.8 offering does not have class leading aberration correction, albeit is fair. Nikon’s 24 and 35 1.8 lenses released really are so-so lenses when it comes to a serious astro shooter like myself. I looked at their 1.2 glass for a second knowing the conclusion I would probably form quickly - they are simply too massive and heavy to use on a star tracker, what’s worse, they offer no benefit. I cannot shoot them at f/1.2 (no one can make a reasonably priced, shootable f/1.2 prime lens for astro, believe me). For me, the perfect balance has always been f/1.4 with good correction. Give me 1.4 for aurora and meteor showers (think clear aperture, see detailed explaination here), and enable me to shoot at f/2.2-2.8 with clean stars into the far corners and I am happy, relatively.

What about DSLRs? I sold one...my D850, as it had high value and helped to partially fund the Z 8. I'm keeping the rest, and might even pickup a mint d810 as a spare to my current d810. I love OVFs! As much as I love the Z 8 EVF and the bells and whistles it brings...I think I'd personally prefer to stare through an OVF all day if shooting sport or wildlife as any EVF is technically like looking at a TV screen. If I shot sports, I honestly think I would have stuck with OVF for a long time, or perhaps forever. The way most modern landscape photography is carried out is via the screens, no the OVF, so you can see why mirrorless mattered to me. (Regarding the Z 8, I mention this, not because the EVF is bad in the Z 8 - it isn't, and not because I am an old timer; I am not). Again this comes back to one of the many reasons I wanted to grab the Z 8 body - I don't use the finder as much on that body anyway. 10 years ago I'd have sold everything and went mirrorless then ended up realising my mistake and having to buy back some DSLRs for different purposes. Using the principal of ‘tool to task’ - there has never a more pertinent expression when it comes to deciding on a camera and lens to work for your needs rather than against.

Snowcapped Cuillins from Sligachan, Isle of Skye. Z 8 with 24-70/2.8S

Nikon really aimed high here and got it right, for the most part. The price was / is high, however it will come down. I bought quickly like the d800 days, as I have been waiting a long time (how those savings accumulated thankfully). I applaud the lack of shutter in this camera. I think it was the right decision and will likely make the camera last even longer than it would otherwise. Like I said...I think shooting studio flash work I'd be using an OVF but that's just me...we have to consider that these aren't custom made cameras to our own specifications; however that non withstanding, logical upgrades and firmware adjustments where appropriate can certainly be requested, and debated.

Some further thoughts which I will continue to add to for those on the fence. I updated my 24-70/2.8 lens firmware there to 1.20, in order to take advantage of linear MF, now activatable in the menu. I must say, the focus throw can be made huge (720 degrees and over) and it makes focusing manually butter smooth. I am interested in this for critical astro applications (albeit not in particular with this lens), but this will be great for landscape photography which is mainly where I will use this lens. I like to do the focusing manually and confirm it is optimal for the scene. Combined with starlight view, this is going to be amazing at night. (2024 edit - it is). The 20/1.8 will be good to use with this feature. This should really allow me to nail balance between the centre frame and corner to manage astigmatism and coma, which was a nightmare with DSLR monitors at night which where made less sensitive - they sat at 60 FPS even in darkness which is pointless! In DSLR land (especially the earlier models) it was hard to actually see the stars sometimes in order to do this critical focus pull, ironically one felt a bit blind at night. The 14-24/2.8 tempts me for astro and landscape use but I note it does not have this feature - I wonder why, and hope they will bring it to it. I love to get critical focus in landscape manually, too. (2024 edit - I now own this lens and have been using it for about 8 months’ now - it is indeed very easy to compose an UWA shot with starlight view).

Nikon Z 8

Following on from this, I still cannot believe how bad Snapbridge still is all these years on. It can barely connect half the time, and if it does it disconnects, fails 3/4 of the way through the process (and it can take while to get there, fail and you have to restart the process and hope it will work). Nikon please hire a better software person, an app person please. This is not a Z 8 complaint but since it could be an amazing part of the Nikon ecosystem I mention it here. Why am I still having to remove a card from the camera to update firmware on a lens? The camera can connect (should be able to) to Snapbridge, and it should be a simple option there to update lens or camera firmware going forwards? I cannot see one, nor connect right now to confirm however it is very clunky for 2023. It really would be great if this was fixed and improved overall for user experience. (2024 edit - Snapbridge is a bit better, and firmware can be updated via Snapbridge, so some improvement here).

Lastly can I point out how well built this 24-70/2.8 is? It is also so sharp right in the corners at most focal lengths and apertures it really can sit with the best of lenses, fully sealed and it looks smart too, still remaining one of the lightest 24-70/2.8 lenses ever and probably optically the best which is no mean feat. (PS the display button should automatically adjust to outdoor and indoor brightness, like I previously mentioned that the back LCD should too ala phones). Nikon, if you ever update this lens, put in the VR switches on the body please…

Ramble complete,

Steve

Quiraing, Isle of Skye Scotland. Nikon Z 8 with 24-70/2.8S

The Nikon D200

Nikon D200 with 18-55 mm f/3.5-5.6

The History

I always like to have a camera with me these days. For a while, I stopped unless I was in “Serious Landscape or Astro-Photography Mode,” and I just used my phone - which I was never really that happy with except in a pinch - like maybe at a theme park or something where I absolutely felt I could not bring a camera in with me, or if I did it would be a real annoyance all day. I used to lug the big cameras everywhere, for every occasion - I am speaking about FX Nikon DSLR or mirrorless bodies like the D810, D850, Z 8. I love using them, however they aren't lightweight systems, so in recent times I've made a much more concious effort to free myself from that weight and use a Nikon D200 with an 18-55 mm f/3.5-5.6. Such a brilliant combo, and sometimes I pack a tiny 50/1.8 prime too. With regards to weight; it feels like I don’t even have a camera with me at all. The CCD colours are just sublime. I love the way this sensor draws. The D200 gives me a different look to the other cameras, and I really like using it. I know many would be screaming at their screens reading this, telling me “oh buy a Z 7, it’s lighter, that will work,” or something along those lines. However a long time a go a friend of mine from overseas who used to shoot the same body I did at the time - the D800, was experimenting with CCD bodies from the classic era of digital tech. At first, I thought he might have been crazy to ditch something as technically proficient as a D800 for this, however over time I began to see what he was speaking about. (And no, I didn’t ditch the high resolution cameras).

The Tech

The D200 seems to have a special mix of a 10MP Dx CCD sensor and a strict colour filter array (CFA). A CCD sensor stands for a charge-coupled device, which is an integrated circuit containing an array of linked, or coupled, capacitors. The CCD sensor was indeed very common at the onset of digital camera tech - with many companies using them in their cameras. What tended to happen over time, was that as the demand for cleaner high ISO increased, cameras with these sensors tended to fall apart in terms of their noise performance, so demand for different tech came about. Along came CMOS sensors, which filled this need, and they slowly became in vogue, whilst also becoming cheaper to produce. With regards to CCD sensors, the specific part that makes or breaks them with regards to colour, is called a Colour Filter Array. A colour filter array (CFA) is a mosaic of colour filters (generally red, green and blue) that overlays the pixels comprising the sensor. The colour filters limit the intensity of light being recorded at the pixel to be associated with the wavelengths transmitted by that colour. Some people make the mistake of thinking all CCD sensors have ‘good’ colour. Whilst there might be some secret sauce in these sensors (which is beyond the scope of this blog post), it is the CFA that differentiates said colours, allowing punchy and subtle saturated colour. More CCDs in the early days had stricter CFAs, thus they became associated with the trait of having good colour, which is of course a subjective quality. The CFA then, in a very real sense, differentiates and separates each colour so that if done optimally / correctly, subtle colour gradiations can be recorded and made vibrant and punchy. The general trend over the years, was to achieve cleaner higher ISOs, that manufacturers’ weakened the CFA properties in cameras generally compared to early digital cameras that had CCD sensors. This allowed more light to pass and be recorded by the sensor, (thus helped with noise performance) however it also muddied colours and individual graduations don’t tend to show as well, or as punchy. Some colours even skew a little, yellows might slip to green tinged etc, other colours might contaminant others. Some people will tell us that they can get any file to look like a D200 RAW file, or any other camera. I’ve yet to see proof of that yet, but I suppose if it is possible, it would be a lot of work, so why not just use the camera that does it off the bat? The power of the CCD and a strong CFA is easy to see in the D200 - colour separation makes the different colours pop like with Kodak Ektar film or Kodachromes. To reproduce the same color micro contrast tones on Sony CMOS files, you’ll need to fine tune every different colour separately and fabricate presets depending on the lighting too. Further to this, you will have to be very careful during RAW development that you don’t cause the already saturated colours to go ‘nuclear’ when dealing with the subtle tones. That isn’t a workable solution in my mind…

NB: Despite these being my thoughts, I still recommend setting up appropriate picture controls in camera and in your software as your best starting point for your edit style and goals.

Learning

I read all about this stuff that my buddy was showing me, however I mostly continued ‘business as usual’ shooting with bodies like the D800, D810, D850, bringing out the D200 I eventually bought for my son only occasionally. I will be honest, I still use these a huge amount, they have bags of dynamic range, and they are obviously no doubt better at night. I am not for a minute advocating everyone pick up old bodies and just use them - unless of course you feel this fits for you. However, in buying a D200 for my son several years ago to get him along on trips with me, I have found myself using it more and more. I managed to find this copy on ebay with only a couple of hundred shots on it and in absolute mint condition, for next to nothing. I unfortunately blew the highlights a little on his knee at the bottom right, in the pure excitement of him opening the D200 box. This was not a staged photograph!

D810 capturing the D200 as unboxed for his birthday with a 50/1.8 prime

Since that day, we have both used this body a great deal. For what I call reportage landscape photography, it is excellent, and works well. We have even used it for long exposure photography, despite it’s lack of liveview functionality. I am using it a great deal whlist I wait on long exposures completing on my Z 8 camera.

What the D200 is for

I am sure many people reading this are still extremely fixated on megapixels. Some of this might come from pressure from other shooters, or a preconceieved idea that more is better. I used to be a little bit like this, however not nearly as extreme as some of the pixel peeping crazies we see in forums. I am very used to shooting high megapixel bodies and have good technique because of this. I am no stranger to 36 - 60 megapixel files, and I make panoramic pictures regularly. I am a technical shooter through and through. I maximse data collection at the scene. I use good technique, solid equipment and expose in order that I can get the most out of each file as possible, most of the time for daylight work that involves exposing to the right (ETTR) and if dynamic range exceeds the sensor capture range, bracketing shots. All that said however, I am not beholden to this megapixel thing so many seem to be, and I am so glad I freed myself of it. The Nikon D200 has 10 Megapixels across it’s large Dx sensor. I find them absolutely plenty and I use a 4K proart monitor to edit on. The D200 should be clamped to base ISO, or as near as it as possible at all times. Give it light. Expose as far to the right as possible so you will be able to bring up some shadow detail later in the RAW, bracket if required. RAW convertors have given a new life to early digital tech. We can do a great deal more with these files than we could in 2005. The D200 has a maximum native ISO of 1600, however as I point out - there are better tools for that task if needed. I do like using primes on the D200 - one of my favourite is the nikkor 24/1.4G, giving a nice 35mm equivalent view to full frame on this dx body. If I am hiking / walking / taking the D200 out for serious landscape work, I pop the 18-55 lens on it. I may seek to add a wider dx lens for this purpose, at some point in the future. I do love my foregrounds…

D200 shooting with a 24/2.8D prime - taken with D810 and 50/1.8D

Legacy

The Nikon D200 has a big legacy for me. This is the sad part of the whole story. My buddy, Brandon, passed away in 2022, suddenly. He was a young man with a wife and two young children. We spoke every day without fail usually, even if it was just about something we’d read or something about a camera or work. When the news came in that he was gone, this led to the longest period of me not shooting since I started. It lasted a couple of months until I started picking up the cameras again. This might seem like a short period of time, but you have to remember - for someone that had a camera in their hands almost daily, that is a long time in the grand scheme of things. We couldn’t offer much. What can anybody do in a situation like this, except to affirm that if they need anything, they are here? It led my son and I to express it the only way we knew how to properly justify what we felt. We made a picture. That picture is below, shot with the Nikon D200 and a Sigma 35mm f/1.4 Art prime lens. The concept of this picture is obvious, however the technical side was to ensure a natural shadow pallate with a smooth and controlled highlight rolloff, without it feeling like it has had the HDR treatment. This picture was shared online and has been viewed many times - it is very touching to me. I have had many people contact me to say that it inspired them to pick up a D200 which is really nice to hear. And some it just made them pick up and use the camera that they have - which of course is also lovely to hear that someone has been inspired to get out and use their gear.

D200 with Sigma 35mm 1.4 Art prime

I’m going to leave you with my buddy’s best D200 process settings to get the most out of the camera that I still use to this day. Feel free to give them a go. Make sure you tweak your picture control settings. In camera matching ‘Neutral’ for Adobe Lightroom works well. Adobe Colour also works, but is much more contrasty so you may have to make allowances for this. The settings are listed below:

WITHIN ADOBE LIGHTROOM

These are my optimal RAW default settings for Nikon D200 files in Lightroom:

Under the "CALIBRATION" adjustments group:

o Set Red Primary channel to Hue -15 and Saturation +15. (This corrects for Adobe's orange skin tone bias with Nikon cameras)

Under the “LENS CORRECTIONS” adjustments group:

o Set “Remove Chromatic Aberration” is checked under the Color Tab.

o Leave Vignetting and Distortion sliders set to off.

Under the “DETAIL” adjustments group:

o Leave Sharpening at its default settings (40, 1.0, 25) with a masking of 50.

o Set the Color noise slider to 0 and the Luminance noise slider to 0.

Under the “TONE CURVE” adjustments group:

o Select “Linear Contrast” as the baseline tone curve.

Under the “BASIC” adjustments group

o Set "Adobe Color" as the default camera profile.

o Set 5650K +10T as the WB default (as most pictures are daylight).

o Set Shadows to +25 as default. (Look for a natural setting that simulates the eye).

o Set Vibrance to +25 as default.

o All other slider settings at 0.

Save all of these as our D200 default settings on import. When you open files for editing in Lightroom:

o Verify that the white balance is accurate and adjust it if not. Cloudy looks good around 6650K +10T and artificial lighting requires dialing in like usual.

o Now shift-double-click the Highlights label to auto-set clipping protection for your WB. Don’t be worried about big numbers like -71, etc. You want the color clipping protection it affords. If you change your WB later, re-do this step.

o Fine tune your mid-tones with the Exposure slider. I use my Lightroom exposure preset tree (shared earlier) to quickly preview the optimal mid-tone point. Often I’m backing the exposure down -.33 or -.67 in order to get the highlights safely to the left of the “Whites” range. This will leave the image a bit under-exposed and dull but I use Nik’s Pro Contrast filter to brighten the image back up in Photoshop later. That boosts both highlights and shadow areas with the added benefit of boosting local contrast (which adds to the 3D Pop).

o Push up the black point so that it just barely clips. When processing portraits I make sure no blacks are clipped in eyes/hair. I don't touch the White Point slider anymore these days.

o If skin tones look way too strong bring Vibrance down to taste. +25 is good as a default but occasionally I have to use -10 simply because the lighting saturates the colors more than usual.

o Adjust noise reduction to taste. If I’m a little above base ISO or pushing up exposure by +.67 then I’ll use Color NR +15. If I’m above ISO 400 or pushing up exposure +1 or more I’ll use Color NR +25. Otherwise I’m at 0 for both Luma and Color NR.

IN ADOBE PHOTOSHOP

o Open Nik Color Efex Pro 4 and choose “Pro Contrast” from the left panel. Leaving the Color Cast and Correct Contrast sliders at 0%, push up only the Dynamic Contrast slider until the image feels right. This will raise the brightness of your highlights back to normal while still generally protecting your colors from clipping. 20% to 30% is safe for almost any image including those with people. Some images without people in the frame can take 50% or even 70%. I have Photoshop actions setup to automate this function at 10% increments from 10% to 100%.

o Add saturation. I use Photo Wiz’s ContrastMaster filter to boost saturation as it automatically figures out a natural looking result for the ambient surroundings. Sometimes it over-boosts skin tones, however, so I leave them as is and reign skin back in with Viveza2 as described below. If you need a copy of ContrastMaster let me know.

o Fix local exposure issues or local over-saturation issues with Viveza 2. I find that mildly oversaturated skin falls back into place with Saturation of -15, strongly oversaturated skin falls into place with Saturation of -25.

Nikon D200 with 18-55 mm f/3.5-5.6 at St Monan’s Scotland

Nikon D200 CCD Sensor

The Nikon D200 Body

So what is next? Well, I would like to pickup some other bodies from this era, such as a D60. For now I will continue with the D200 to see what I can produce over the coming months into the summer and perhaps another blog post will come about from that.

Steve