Comet over the Witch
Introduction
C/2025 A6 (Lemmon) is a non-periodic comet discovered by the Mount Lemmon Survey in images obtained on 3 January 2025.
The Witch
In 1657, legend has it that a woman suspected of witchcraft was burnt here during the Scottish Witch Trials. Records show that around 6–9 women were condemned as witches and were killed in this small village of Dunning. For me, this place is a testament to the every woman that died during the witch trials that went on around the world hundreds of years ago.
C/2025 A6 (Lemmon) is a non-periodic comet discovered by the Mount Lemmon Survey in images obtained on 3 January 2025. It won't visit us again for over 1300 years. Needless to say, this was my only chance to photograph it.
In order to show the comet with all it's detail, which is only just visible in dark sky locations, and fairly small in terms of angular size in the night sky; I shot it on it's own with a fast telephoto lens to gather the structure and huge ion tail behind it. I decided to leave it like this rather than shrink it down too much as it looked to grand shot up close. The shooting and processing of an image like this is a huge task and takes time, no matter one's experience level. Including shooting, it must have totalled about 8 hours minmum.
Shooting the Sky Mosaic
I obtained this picture in the village of Dunning, Perthshire. Because it was clear the second time I arrived here last night, I got immediately to concerning myself with shooting the sky and not the foreground first (cloud could scupper my shot at any moment). This is generally speaking, the way to go about taking shots such as these. I used a Nikon Z8 with a Tamron 35/1.4 lens. This is a spectacularly well corrected lens on starlight, which can be shot wide open at f/1.4 (which is exactly what I did, because cloud was an issue last night). A 35mm f/1.4 lens isn’t always associated with astrophotography (particularly with beginners), however it is an excellent lens to get tighter on deep sky objects, asterisms, constellations, and the milky way. How I used it last night, was to make a panoramic image to encompase the same field of view as the foreground would end up being. I did 30s exposures in vertical orientation, ISO 800 at f/1.4. I took five of these, with generous overlaps. This was all done on my polar aligned Star Adventurer tracker mount, in order that I got perfect stars right into the corners, and great detail.
Shooting the Foreground
I shot the foreground with a 20mm/1.8S nikkor. I ensured that I would obtain the same field of view as the sky mosaic. I shot at ISO 800, 2 minutes, f/1.8. I choose this aperture, because I wanted a nice depth of field falloff, and had nothing important in the corners to concern myself with. I made sure that focus was on the grave, as at infinity this area would not be in perfect focus.
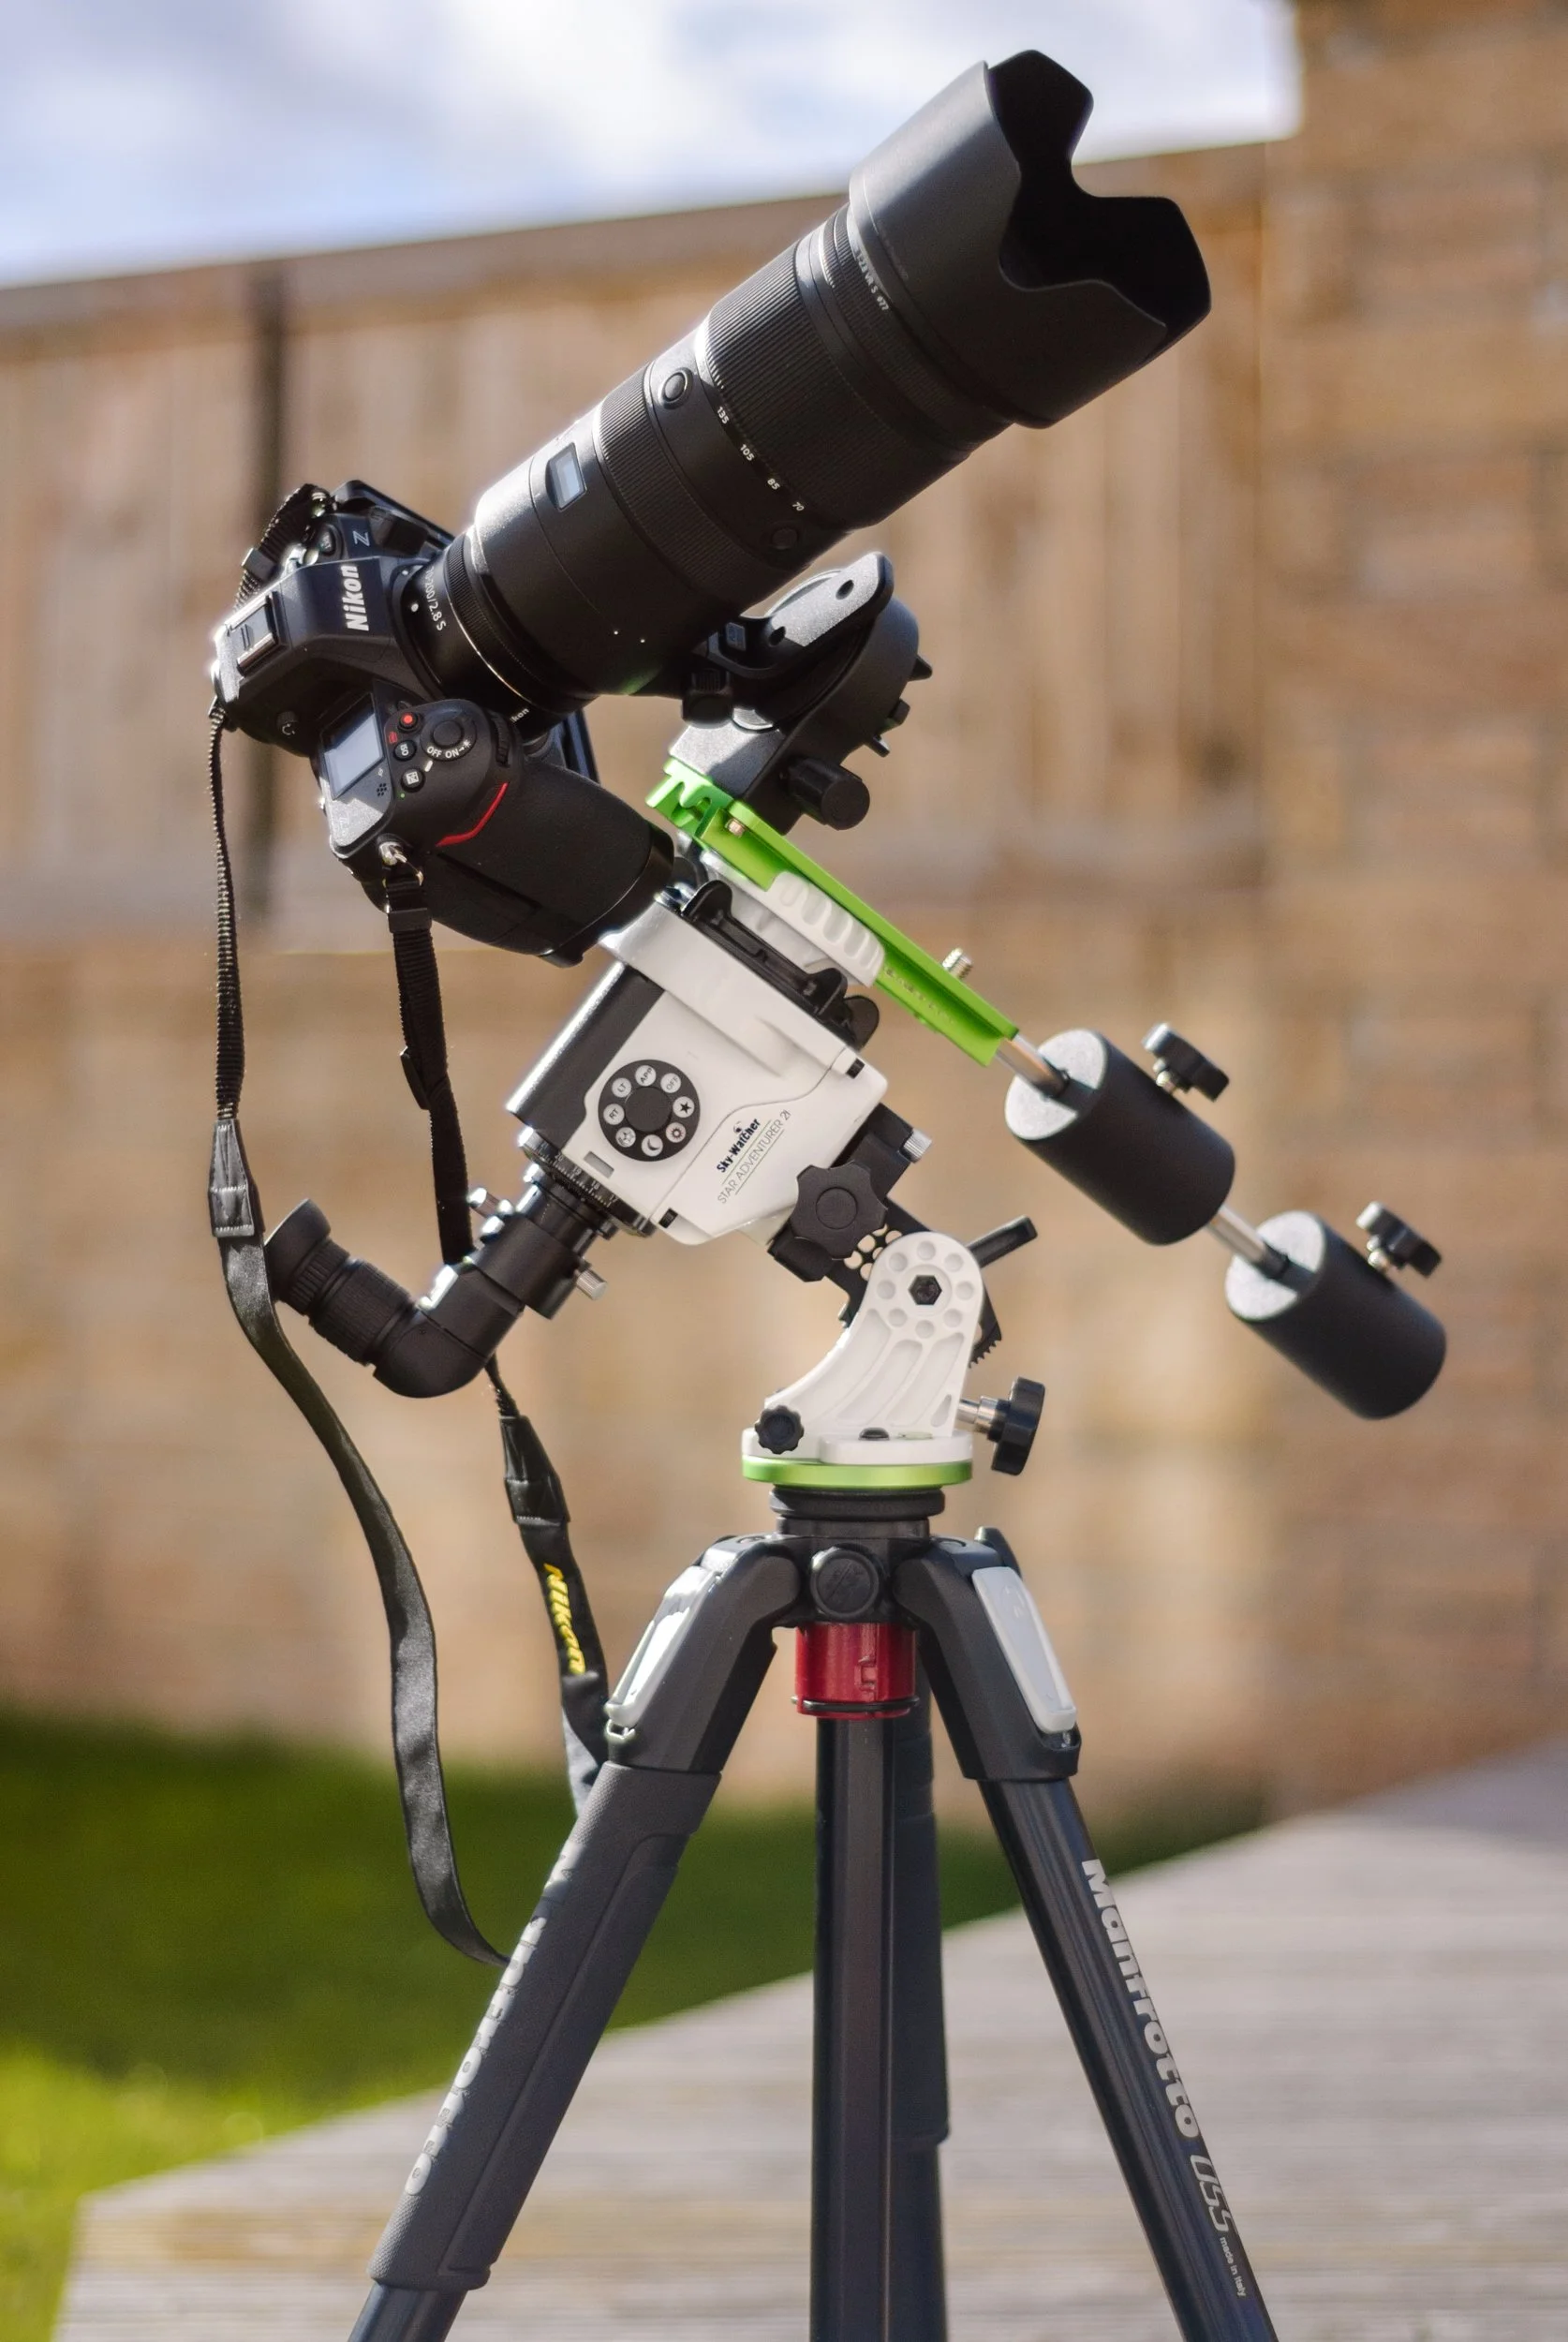
The Technical Side of obtaining a Deepfield Comet Picture
To image the comet you see embedded in this panoramic picture, I used a Nikon Z8 camera with their 70-200/2.8S lens on a Star Adventurer star tracker mount. I use the ‘pro pack’ version with wifi for this mount, which allows me to properly balance the payload with the counterweight kit onto the top of the mount. This is essential in order to do any sort of deep sky, or ‘magnified’ close up images of celestial objects such as comets or galaxies / constellations. I took approximately 50 pictures of the comet on it’s own at 200mm. I used about 43; seven having some light cloud obstruct the view of the comet during the exposures.
I shot the comet as mentioned, at 200mm with the following settings:
Aperture of f/2.8
Exposure time of 30s
ISO of 800
I will address these in order. The widest aperture is always where we should use the lens for comet imaging. Forget worrying about lens aberrations and the stars in the midframes corners, at least for now. The most important point to hold in your mind is that we need to collect light and fast. We do this by having the largest aperture. This concept is called clear aperture and you can read more about this online if you want to understand it in a deeper way as it relates to astrophotography. This brings me nicely to the exposure time. The other way we gather light, is clearly via exposure length; in fact these are the only two variables that influence the final collected light. (ISO is a digital boost for the most part, and does not change the physical light collected during at exposure). Lastly, the ISO of 800 was selected because it is sufficiently low enough as to protect the star cores from blowing out to white during the individual sub exposures, and because it, along with the aperture and exposure time, created a histogram with the data bump being approximately 1/3 from the left wall. We have to be really careful here. I am often slightly under this, to protect the stars blowing out to white, which doesn’t tend to look great in the final picture. Notice that I have picked up the individual star colours in the final shot above? Let me be clear here, that the Star Adventurer mount is capable of easily doing one minute tracked sub exposures at 200mm. In fact, I’ve managed two minutes with accurate stars. I’ve even pushed to over two minutes before…
This is a very good result for only approximately 21 minutes of total data. The more data we get, the better the image can be, technically speaking. You should always aim for this, however sometimes cloud, rain or life stops us from going any further. This image could only really be improved from a technical standpoint by increasing the number of sub exposures that I can stack together in post processing and / or by moving up to a telescope with a larger effective aperture. (Remember that aperture is a ratio of focal length. There are f/11 scopes with greater aperture than my 200/2.8 lens which has approximately 71mm of aperture). We can surmise this via the basic equation:
Focal Length / lens aperture ratio = effective aperture for light collection
So imagine I used an 800mm telescope with an f4 aperture. I would have 200mm of aperture to gather light. Significantly more aperture, yes, however with that comes the demand for significantly more equipment, accuracy and alignment. And of course…expense and weight! For me, there aren’t enough clear nights in Scotland in my opinion for me personally to take this side of what I do any further as I already split my clear nights between landscape astro, and deep sky shooting already. I do absolutely enjoy every minute of maxing out what I have. There are of course limits of what a 200mm lens can resolve, with regards to the physical size or the ‘angular view’ of the object in the sky. The smallest of objects need more aperture and focal length, that’s just the way it is. I find it extremely satisfying to max out or ‘use up’ every possible trick in the book to create the best picture from the equipment I own, in a carriable sized package.
Here is the latest shot I made of the comet over Scotland:
Comet C/2025 A6 (Lemmon) Over Scotland
If you have ever shot a comet at 200mm and tried to frame it over a landscape I applaud you. This was an extremely difficult picture to pull off, both in execution at the scene, and in post processing. High wind gusts made tracking at this focal length really tricky and I shielded the setup as best I could. I tracked the comet at 200mm on the Star Adventurer mount, even capturing the faint pink glow of aurora. After I managed 70 frames of the comet, I shot the landscape directly below it at the same focal length.
The comet was shot at 200mm, f/2.8, 30s, ISO 1600.
The ground was shot at 200mm, f/2.8 for 4 minutes.
The processing was extremely complex. I've never shot a comet that wasn't this way, especially if we want to get the absolute best detail possible in the faint tail. (I binned a lot of frames with too much motion blur). 200mm / 2.8 gives a good amount of aperture to suck in light for these tasks. (71mm).
If you enjoyed this article, consider following me on Instagram or Facebook.
Steve